
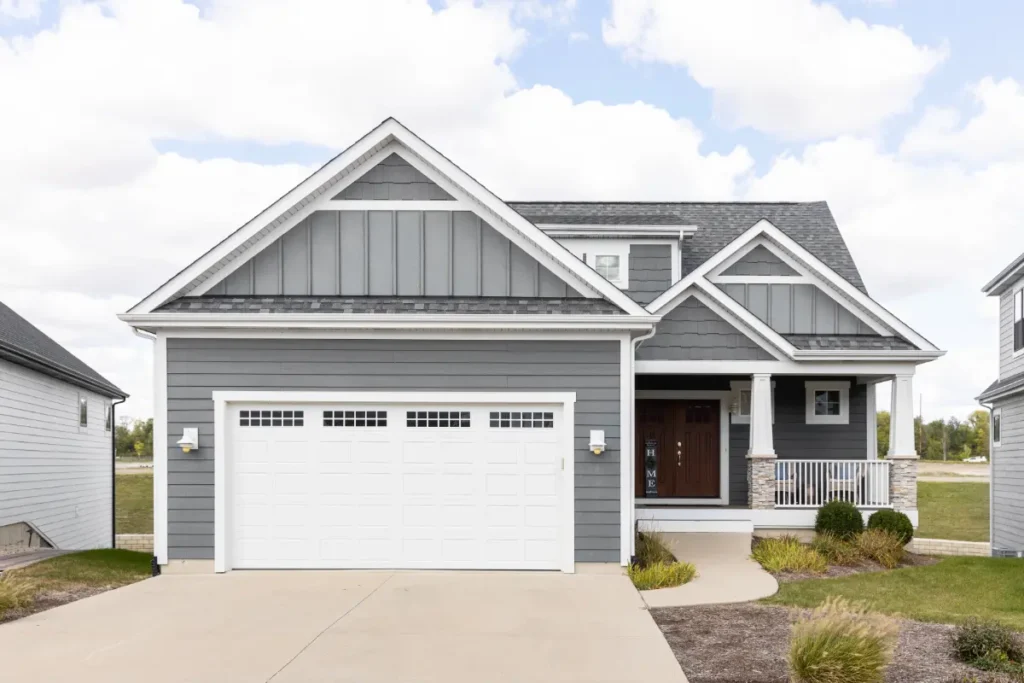
New siding is one of the biggest visible changes you can make to your home. It's also a project most homeowners only go through once or twice, which means a lot of reasonable questions: How long will it take? Do I need to be home? What happens if they find a problem under the old siding? How loud is it?
This guide walks through a full siding replacement from start to finish, the way it typically works on a northern Illinois home. Every contractor does things a little differently, but knowing what a proper job looks like helps you ask the right questions and know what to expect. For an overview of the materials and services we offer, see our siding services page.
Most full siding replacements on a standard home take 3 to 5 days of work. The sequence is estimate, material selection, permits and scheduling, prep, tear-off, sheathing inspection and repair, weather barrier and flashing, installation, trim, cleanup, and a final walkthrough.
Step 1: The Estimate and Measurements
A good siding estimate involves more than a quick look from the driveway. Expect the contractor to walk the entire exterior and:
- Measure every wall, gable, and dormer
- Note windows, doors, outlets, hose bibs, vents, light fixtures, and anything else the siding has to work around
- Look for signs of problems under the current siding — soft spots, bowing walls, water staining, peeling paint on trim, or gaps around windows
- Check the condition of soffit, fascia, and gutters, since they're tied closely to the siding
- Ask about your goals: appearance, durability, energy efficiency, storm damage, or getting ready to sell
You should come away with a written estimate that spells out the scope, materials, and what's included — tear-off, disposal, house wrap, trim, and cleanup. If anything is unclear, ask before you sign.
Step 2: Choosing Material, Profile, and Color
Next comes the fun part, and the part where it pays not to rush. You'll decide on:
- Material. Vinyl, steel, or insulated panels in either. Our guide to vinyl vs. steel siding walks through the trade-offs for our climate.
- Profile. Traditional lap, Dutch lap, vertical board-and-batten, or shakes and shingles for gables and accents.
- Color. Siding color, trim color, and how they work with your roof, brick or stone, windows, and front door.
- Trim details. Window and door surrounds, corner posts, and frieze boards all affect the finished look.
Colors look very different on a small chip under store lighting than they do across an entire house in daylight. We bring samples to your home so you can hold them against your roof and trim at different times of day.
Step 3: Permits and Scheduling
Many siding replacements in our area require a building permit, depending on the municipality and scope of work. Your contractor should know the local requirements and pull any required permit — we handle this on every job. It's not something you should have to chase down yourself.
Once materials are ordered and permits are in place, the job goes on the schedule. Siding can be installed in most seasons, but northern Illinois weather does shift schedules. Heavy rain, high wind, and extreme cold can delay a start date or pause work for a day. A good contractor will keep you informed rather than leaving you guessing.
Step 4: Preparing Your Home
A little preparation before the crew arrives makes the job faster, safer, and easier on your property:
- Clear space around the house. Move patio furniture, grills, planters, garden decorations, and anything else near the exterior walls. The crew needs room for ladders, staging, and a work area.
- Move vehicles. Park out of the driveway if it's needed for material delivery or a dumpster.
- Take down wall hangings on exterior walls. Tear-off and nailing cause vibration inside the house. Pictures, mirrors, and shelves on exterior walls are worth taking down.
- Think about plants. Your crew will protect landscaping as much as possible, but delicate plants right against the house may get stepped around, and it's worth trimming back shrubs that touch the siding.
- Plan for pets and kids. There will be ladders, tools, and debris around the house. Keep pets inside or away from the work area.
- Unlock gates and note anything important. Let the crew know about sprinkler heads, buried lines, septic areas, or anything else they should avoid.
- Give your neighbors a heads-up. It's a courtesy they'll appreciate, especially if the lots are close together.
Step 5: Removing the Old Siding
On the first day, the crew typically sets up and starts removing the old siding, working one wall or section at a time. A dumpster or trailer is placed nearby for debris.
This is the loudest part of the project. Expect prying, banging, and debris coming off the walls. Most homeowners stay home and go about their day just fine, but if you work from home and have important calls, plan for a noisy morning.
On many 1950s through 1980s homes across the Rockford area, the existing siding may be original aluminum, early vinyl, or even older wood siding that was covered up decades ago. In some cases, old siding can stay as a base layer; in many cases it's better to remove it so the wall can be inspected and the new siding lies flat. Your contractor should explain which approach they're recommending and why.
Step 6: Inspecting and Repairing the Wall
Once the old siding is off, the crew can see the sheathing — the layer of boards or panels attached to the wall framing. This is the most important inspection point of the entire project, because anything wrong here gets covered for decades.
Common findings on older northern Illinois homes include:
- Rot below windows and around doors, where water has been getting behind the old siding or trim for years
- Soft or damaged sheathing near the ground, where snow piles up against the house each winter
- Water damage below leaking gutters or at roof-to-wall intersections
- Insect or animal damage
- Missing or deteriorated sheathing on older homes with minimal wall sheathing
Damaged sheathing should be replaced before new siding goes on. Covering it up only hides the problem and can shorten the life of your new siding.
If we find rot or damage under your old siding, we stop and show you — in person or with photos — explain what it takes to fix it, and get your approval before doing any additional work. You should expect that from any contractor.
Step 7: House Wrap and Flashing
Siding is your home's first line of defense against weather, but it isn't watertight on its own — and it isn't supposed to be. Wind-driven rain gets behind siding. What keeps that water out of your walls is the layer underneath.
Weather-resistive barrier. A house wrap is installed over the sheathing, lapped so water runs down and out rather than behind it. On insulated siding projects, the foam backer works together with this barrier.
Flashing. Windows, doors, roof-to-wall intersections, and wall penetrations like dryer vents and hose bibs are the most common leak points on any home. Each one needs to be flashed and integrated with the house wrap so water is directed out and away. This is detail work that's invisible once the siding is on, and it's one of the biggest differences between a good installation and a poor one.
Step 8: Installing the Siding and Trim
With the wall prepared, installation follows a logical order:
- Starter strip along the bottom of each wall, set perfectly level so every course above it runs straight.
- Corner posts and J-channel around windows, doors, and edges to create clean, finished transitions.
- Mounting blocks for light fixtures, outlets, hose bibs, and vents, so these items sit flat and sealed instead of being cut in awkwardly.
- Siding panels, course by course from the bottom up, with each panel locked into the one below.
- Trim wrapping around windows, doors, and fascia where specified, finished to match or accent the siding.
- Gable and accent details like shakes, vertical siding, or decorative trim.
With vinyl in particular, how each panel is fastened matters enormously. Vinyl expands and contracts with temperature and needs to hang loosely on its nails with room to move at the ends. Panels that are nailed too tight will buckle and wave. It's a small detail you won't see, but you'll notice the results for years.
If your gutters are attached to fascia that's being wrapped or replaced, they'll be removed and rehung. Many siding projects also include new soffit and fascia, which gives the roofline a finished look that matches the new walls.
Step 9: Cleanup
Siding projects create a lot of debris: old siding, nails, scraps, packaging, and trim cutoffs. Expect:
- Daily cleanup of the work area, so your yard isn't a job site overnight
- A magnetic sweep of the lawn, driveway, and landscaping beds to pick up stray nails
- Removal of the dumpster and all debris at the end of the job
Even with a careful sweep, it's a good idea to walk your lawn before the first mowing and keep an eye on driveway areas for a few days.
Step 10: The Final Walkthrough
When the work is done, walk the entire house with your contractor. Look at:
- Straight, level courses along each wall
- Clean corners and tight trim around windows and doors
- Fixtures, outlets, and vents seated properly in their mounting blocks
- Gutters securely rehung and draining
- Any repairs made to sheathing or trim
- Cleanup of the yard, beds, and driveway
This is the time to point out anything you're not happy with. At Littlefield, the same crew that did the installation does the walkthrough with you, so the people answering your questions are the ones who did the work.
After the Job: Caring for New Siding
Both vinyl and steel siding are low-maintenance, but a few habits keep them looking good:
- Wash it occasionally with a garden hose and soft brush. Avoid aiming a pressure washer upward under the laps, which can force water behind the siding.
- Keep grills away from the walls. Vinyl can warp from heat.
- Watch the snow line. Try not to let heavy snow piles sit against the siding all winter, and be careful with snowblowers near cold, brittle vinyl.
- Keep gutters clean. Overflowing gutters dump water down the walls and stain the siding.
- Check after storms. Look for cracked panels, dents, or pieces that have come loose after hail or high wind. Our guide to hidden hail damage signs explains what to look for.
Frequently Asked Questions
How long does a siding replacement take?
Most full siding replacements on a standard northern Illinois home take 3 to 5 days. Larger homes, complex architecture, or significant sheathing repairs can add time. Weather can also shift the schedule.
Do I need to be home during the installation?
No. Most homeowners go about their normal routine. It helps to be reachable by phone in case the crew finds something that needs a decision, like rotted sheathing, and we recommend being there for the final walkthrough.
Can siding be installed in winter?
Siding can be installed in cold weather, but it takes extra care. Vinyl becomes more brittle in the cold and has to be handled and cut carefully, and very cold, snowy, or icy days can slow or pause work. Steel is less affected by cold. We schedule around the forecast and will talk through timing with you.
What happens if the crew finds rot under my old siding?
We stop, show you what we found with photos or in person, and explain the repair and its cost before doing any additional work. Rotted sheathing should be replaced before new siding goes on, because covering it traps the problem.
Should I replace soffit and fascia at the same time as siding?
Often it makes sense. If your soffit or fascia is damaged, rotting, or doesn't match the new siding, doing it during the same project means one setup, one cleanup, and a finished look that matches. If it's in good condition, it can stay.
How We Handle Your Siding Project
Littlefield Siding has installed siding on northern Illinois homes since 1986. When you work with us, you get a free estimate with samples brought to your home, a written quote, and permits handled for you. Our own crew does the work — no subcontractors — and the same people who start your job finish it and walk you through the results.
We're a local family business on Riverside Blvd in Loves Park, so if you have a question after the job is done, you can call us and we'll pick up.
Start With a Free Siding Estimate
Planning new siding? Request a free estimate or call (815) 636-6446 and we'll schedule a time to walk your home.
We install siding throughout Loves Park, Rockford, Machesney Park, Roscoe, Rockton, Belvidere, and communities across northern Illinois.